


A job hazard analysis (JHA), also called a job safety analysis, is a short written review of a task. You break the job into steps, ask what could go wrong at each step, and decide how to prevent it. For field service work, where every site is different and technicians often work alone, a job hazard analysis is one of the most useful safety tools there is. It takes minutes and it needs nothing more than a pen and a form.
What a job hazard analysis is
The Occupational Safety and Health Administration (OSHA) describes a job hazard analysis as a technique that focuses on job tasks to identify hazards before they occur. It looks at the relationship between the worker, the task, the tools and the work environment. The goal is to remove a hazard or reduce it to an acceptable level before anyone starts work.
A JHA is different from a general site inspection. An inspection asks “what is wrong with this place?” A JHA asks “what could hurt someone while doing this job, step by step?”
Which jobs to analyze first
You do not need a JHA for every small task on day one. OSHA suggests giving priority to:
- Jobs with the highest injury or illness rates, or a history of near misses.
- Jobs where one simple mistake could cause a severe injury, such as electrical work or work at height.
- Jobs that are new to your business or have changed.
- Jobs complex enough to need written instructions.
For a service company, that usually means roof and ladder work, energized electrical testing, attic and crawl space work, confined spaces, refrigerant handling, brazing and other hot work, and lifting heavy equipment.
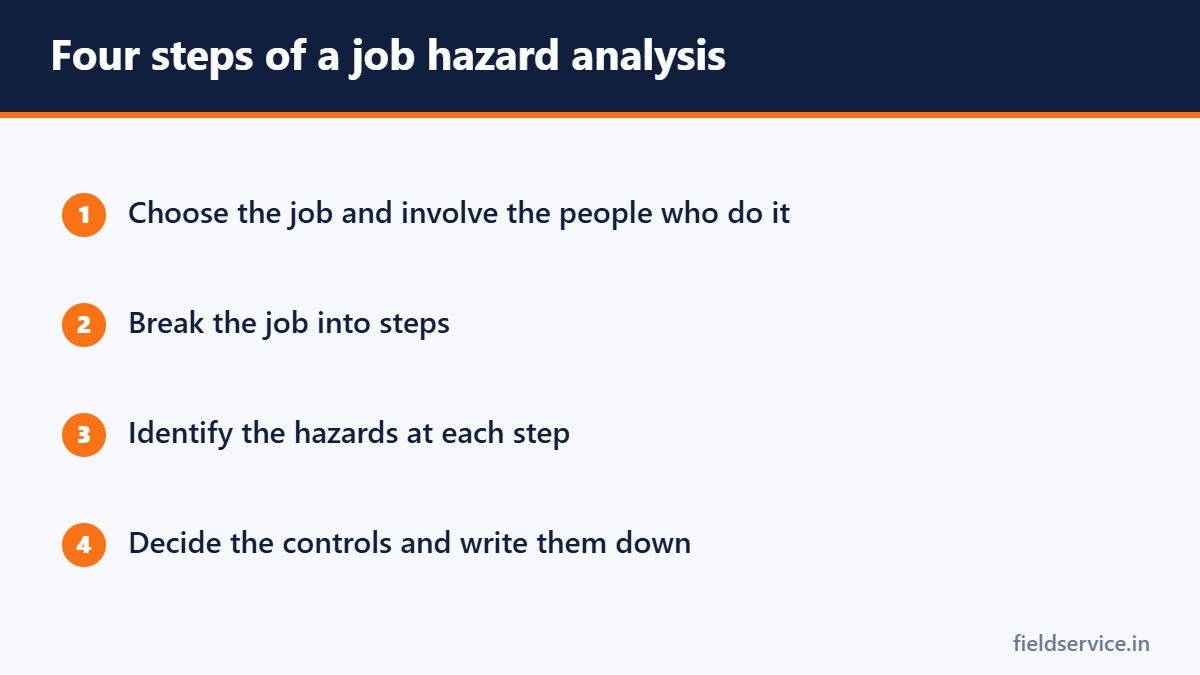
Step 1: Involve the people who do the work
Technicians know where the awkward lifts, the tight corners and the shortcuts are. Build the JHA with them, not for them. People follow procedures they helped write, and they will point out hazards a manager at a desk would never see.
Step 2: Break the job into steps
Watch the job or walk through it, and list the steps in order. Aim for roughly five to ten steps. If you write too few, you will miss hazards. If you write too many, nobody will read it. Start each step with an action word: carry, set up, climb, disconnect, test.
Step 3: Identify the hazards
For each step, ask:
- What can go wrong?
- What would the consequences be?
- How could it happen?
- What else contributes, such as weather, fatigue, time pressure or working alone?
- How likely is it?
Think through the common hazard types: falls, electric shock and arc flash, being struck by or caught between objects, burns, chemical exposure, heat and cold, strains from lifting, and traffic.
Step 4: Choose the controls
Controls are not all equal. Safety professionals rank them in a hierarchy of controls, from most effective to least effective. Work down the list and use the highest control that is practical.
| Control | What it means | Field service example |
|---|---|---|
| Elimination | Remove the hazard | Shut off and lock out power instead of working live |
| Substitution | Replace it with something safer | Use a less hazardous cleaner or a lighter tool |
| Engineering controls | Put a barrier between people and the hazard | Guardrails, covers, ventilation, a lift instead of a ladder |
| Administrative controls | Change how people work | Procedures, two-person lifts, rest breaks in heat |
| Personal protective equipment | Protect the person | Gloves, safety glasses, arc-rated clothing |
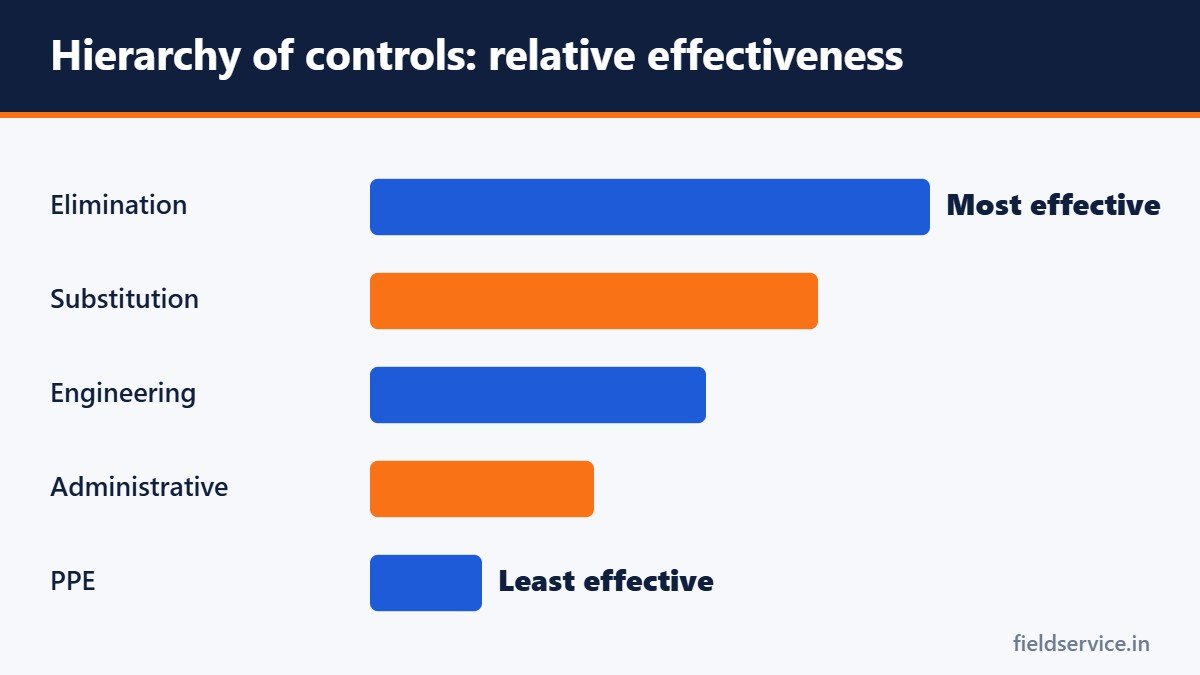
Protective equipment sits at the bottom because it depends on being worn correctly every time. It still matters; see our guide to PPE for field technicians.
A worked example: replacing a rooftop condenser fan motor
| Job step | Hazard | Control |
|---|---|---|
| Carry tools to the roof | Fall from ladder; dropped tools | Inspect and secure the ladder; three points of contact; hoist tools by rope |
| Work near the roof edge | Fall from height | Stay back from the edge; use fall protection where required |
| Open the electrical panel | Electric shock | Disconnect, lock out and verify zero voltage with a meter |
| Discharge the capacitor | Stored electrical energy | Discharge with a proper tool and verify |
| Remove and replace the motor | Cuts from sheet metal; strain | Cut-resistant gloves; get help with heavy parts |
| Restore power and test | Moving fan blade | Refit guards and keep hands clear before energizing |
Our guides to ladder safety and lockout/tagout basics cover two of these controls in detail.
Using the JHA in the field
- Keep standard JHAs for your common jobs, and review the relevant one before starting.
- Add site-specific hazards on the day: weather, access, pets, other trades, the condition of the roof or attic.
- If conditions change during the job, stop and reassess.
- Review each JHA at least once a year and after any incident or near miss.
Technicians who work alone should pair the JHA with a check-in routine. See lone worker safety.
Related guides
- Heat safety for field technicians
- Attic and crawl space safety
- Driving safety for service technicians
Sources
Seven safety forms in Word and PDF, plus an Excel log that counts incidents, open actions and safety meetings.
Not sure yet? Try two forms free or see all packs.
Frequently asked questions
What is the difference between a JHA and a JSA?
They are two names for the same process. Job hazard analysis and job safety analysis both mean breaking a job into steps, identifying the hazards at each step and deciding how to control them.
Does OSHA require a job hazard analysis?
OSHA does not have one general rule that requires a JHA for every job, but several standards require employers to assess hazards, including the personal protective equipment standard. A JHA is a recognized way to do and document that assessment.
How long does a job hazard analysis take?
A JHA for a routine service task can be written in 15 to 30 minutes. Reviewing an existing one before a job takes a few minutes.
Who should write the JHA?
A supervisor or safety lead usually leads it, working with the technicians who do the job. Their knowledge of the real work is what makes the analysis accurate.
How often should a JHA be updated?
Review it at least yearly, whenever the job, tools or materials change, and after any injury or near miss on that task.
This article is general information and is not a substitute for your company’s safety program, required training or the regulations that apply to your work.